Thursday, 18 October 2012

Cocoa Cream Cheese Cupcakes


All my cupcake cups are hibernating for quite some time. It is time to utilize them now.

I made this moist cocoa cream cheese cupcake from 兔紙I changed the assemble method by mixing everything into one mixture. So, there are no 2 layers (white and dark chocolate color). One more benefit is need not to use the cake mixer also can bake a moist cupcake. 


Baking Time: 15-25 minutes
Oven Temperature: 180C
Yield: 20 small cups


Ingredients:

(A)
200g    Cream Cheese
20g      Castor Sugar
1          Egg
1tsp      Vanilla Essence

(B)
150g    Low Protein Flour
25g      Cocoa Powder
1/2tsp   Baking Soda
75g      Castor Sugar
1/4tsp   Salt

(C)
180g    Water
50g      Sunflower Oil
15g      Lemon Juice


Method:
  1. To melt cream cheese: Double boil it or put it into microwave.
  2. Add in sugar to dissolve. Let it cool thoroughly. Add in egg and mix well.
  3. In a mixing bowl, combine water, sunflower oil and lemon juice.
  4. Add the sugar and salt from (B) into the wet ingredients. Mix well.
  5. In another bowl, sift low protein flour, cocoa powder and baking soda twice.
  6. Add the dry ingredients into wet mixture. Mix well with your hand whisk.
  7. Pour the cheese mixture into wet mixture. Mix well.
  8. Pour the batter into cups and bake at preheated oven at 180C for 15 minutes for small cups and 25 minutes for big cups or until the skewer inserted into the cake and comes out clean.


Saturday, 29 September 2012

Mid Autumn Festival


Time flies pretty fast. Last month we just celebrated Hari Raya and this month we are celebrating Chinese Mid Autumn Festival. We can see the lantern these days are more in plastic form operated with batteries. There is little chance to see paper lantern with small little candles hang around the house. Moreover, I can’t find any neighbors’ kids play the lantern and walking around the housing area with the lantern just like what we did when we were young. One of the factors might due to our country have too much criminal case and we are scared of being one of the victim.

Anyway, I still play the paper lanterns at the car porch with my kid. You can see the lantern is in old fashion. Yes, I kept it since 5 years ago. Some of them have burnt bottom. :P

I made the snow skin mooncakes for the first time and did not try after this. My family members dislike eating mooncakes. So, I stopped making mooncake then.


The recipe is modified from Alan Ooi’s 花前月下.


Snow Skin Mooncakes


Mould: 50g Mooncake mould
Yield: 15 Mooncakes

Ingredients:

(A)
100g    Cooked Glutinous Rice Flour (Koh Fun)
130g    Icing Sugar

(B)
26g      Shortening

(C)
97g      Cold Water

Fillings
375g    Lotus Seed Paste


Method:

  1. Snow Skin: Sift ingredients (A), add ingredient (B) and mix well. Add ingredient (C), mix into dough. Divide into 25g each. Roll into balls.
  2. Fillings: Divide lotus seed paste into 23g each. Roll into balls. Set aside.
  3. Flatten snow skin, and wrap the filling with snow skin. Press it into a mooncake mould. Tap lightly to let the mooncake comes out from the mould. 


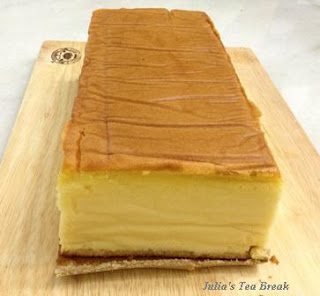
Kasutera


My friend recently went to Shanghai and bought me a Kasutera wooden mould. Thanks to my friend who sincerely brought the mould back here even though her luggage had overloaded. A million thanks to her.

My first ever Kasutera was just nicely baked and it melted in your mouth when you have a bite.

I followed Jane’s Kasutera recipe and it is easy to follow.

Let me translate it into English version.


Baking Time: 50 – 60 minutes
Oven Temperature: 160C
Mould: Wooden mould: 20cm x 11cm Kasutera Wooden Mould


Ingredients:

(A)
250g    Egg (approximately 4 big eggs)
80g      Castor Sugar
50g      Honey
¼ tsp   Salt

(B)
75g      Warm Milk
10g      Ovalette

(C) Sifted
55g      High Protein Flour
90g      Low Protein Flour

(D)
10g      Mirin (you can get this from Japanese shop)
50g      Butter (Melted)


Methods:

  1. Wrap the bottom of the wooden mould with aluminium foil. Put baking paper in the mould and add one more layer baking paper as its base. Place the ready mould on a bigger metal mould.
  2. In a bowl, dissolved ovalette in warm milk. Add in honey, castor sugar, and mix well.
  3. In a mixing bowl, beat the eggs and the wet ingredients at lowest speed (KA at speed 1) till well combine.
  4. Add in sifted flour one spoon at a time till all ingredients well combined.
  5. Beat the ingredients at highest speed. (KA at speed 6). You may stop it awhile to scrap the bottom of the batter up. Continue to beat.
  6. Beat the batter till it becomes creamy and fluffy. You may try to write an “O” and the letter will not disappear within few seconds. That means it is ready now.
  7. Change the speed to the lowest speed again (KA at speed 1), add in mirin and melted butter. Mix well.
  8. Pour the batter into the mould. Shake the mould a bit to release some bubbles out from the batter.
  9. Bake at preheated oven at 160C for 50 – 60 minutes or until insert skew into the cake and comes out clean. (I used 60 minutes to bake the cake).
  10. Put a piece of baking paper on the cake and turn over the cake upside down.
  11. Turn the cake back when it is cool. Take out the mould and let it cools down totally. Cut the cake into slices.

Muesli Bars


A healthy home-made breakfast bars are very easy to make. We just need 30 minutes to do the preparation and bake it.

I made 2 versions of the bars; the first one was too soft and oily and the later one was much better which the texture was much more like our local peanut candy.

I modified the recipe from Australianfood with my own ingredients.


Baking Time: 15 minutes
Oven Temperature: 180C
Mould Size: 30cm x 20 cm Rectangular Mould


Ingredients:

(A)
1 ½ cup            Wholegrain (Roasted)
1 cup                Rolled Oats (Roasted)
½ cup               Sunflower Seeds (Roasted)
½ cup               Melon Seeds (Roasted)
¼ cup               Sesame Seeds (Roasted)
½ cup               Raisins
½ cup               Dried Cranberries

(B)
50ml                 Sunflower Oil or Melted Butter
(the more you put, the softer your bar will be)
½ cup               Honey
1/8 cup            Brown Sugar


Methods:

  1. Grease and line a baking mould with baking paper.
  2. In a big metal bowl, mix well ingredients (A).
  3. Cook ingredients (B) in a sauce pan over medium heat. Stir constantly for 3 to 4 minutes or until sugar has dissolved.
  4. Bring to the boil and reduce the heat to low heat. Simmer, without stirring for 5 minutes. Add butter mixture to dry ingredients. Stir well until combined.
  5. Spoon the mixture into the tin. Use a large metal spoon to press the mixture down firmly and evenly.
  6. Bake at preheated oven at 180C for 15 minutes.
  7. Take out the pan and immediately use a large metal spoon to press the mixture down firmly and evenly again.
  8. Cut them into square and rectangular when it is cool.
  9. Keep the bars in the fridge and it will become more harden and chewy. 

Saturday, 22 September 2012

Wholegrain Milk Buns


Wholegrain is good for our health but the taste is not so attractive. I have one pack of wholegrain which until now I still do not know how to finish the whole package. Well, I am going to make some buns with this and maybe the leftover wholegrain will be used to make our breakfast bar later.

I modified the recipe from 歐風面包100 (page 85).


Baking Time: 15-20 minutes
Oven Temperature: 180C
Yield: 9 Buns (each at 60g)


Ingredients:

250g    High Protein Flour
5g        Instant Yeast Powder
4g        Salt
10g      Sugar
75g      Wholegrain
100g    Fresh Milk
100ml   Cold Water
15g      Butter

Filling:
Some Raisins

Topping:
Wholegrain


Methods:

1.                  Sift high protein flour into the mixing bowl. Add in salt, sugar, wholegrain and yeast. Pour in water and milk.
2.                  Use the mixer to knead the mixture.
3.                  Add in butter when the dough is formed. Continue to knead the dough till it becomes smooth and elastic. 
4.                  Rest the dough in a container or cover with cling foil. Let it fermented for 2 hours or until the dough becomes double of the original size.
5.                  Knead the dough to let the air comes out. Rest the dough in the container again for 1 hour.
6.                  Divide the dough into 60g each and shape it. Set aside to rest for 30 minutes.
7.                  Put some raisins into the small dough and wrap firmly.
8.                  Sprinkle some water on top of the small dough; roll the dough with some wholegrain.
9.                  Arrange the buns on the tray nicely. Set aside to rest for 1 hour or till it becomes double in size.
10.               Bake in the preheated oven at 180C for 15-20 minutes.


Thursday, 9 August 2012

Wholegrain Raisin Buns


I checked back my blog and found that I have been 3 months never update my blog. June and July were my busiest months as I traveled a lot with my family.

Now, it is time to start warming myself at the kitchen. I tried to bake some European buns today. Maybe I have been too long did not interact with my oven. I over-burned the buns which have a very dark bottom with taste like a charcoaled coffee bean.

Anyway, I will try to bake this bun again because this bun is very healthy, eggless, less oily, need not to wait window panel and I can apply some flour on my hands when kneading.

Recipe adapted from 石師傅的面包教室 at page 193


Baking Time: 15~20 mins
Oven Temperature: 180C upper heat, 160C lower heat (My oven has only one heat for both, so I use 180C)
Yield: 7 buns


Ingredients:
180g    High Protein Flour
1.5g     Salt
3g        Instant Yeast
120g    Water (I used cold water)
9g        Butter
65g      Raisin
27g      Walnut (I omitted this)

Topping:
Wholegrain or Oatmeal


Methods:
  1. Soak raisins in the water for 15 minutes and. Drain the raisins and set aside. (This is to prevent the raisins becomes too dry after baked).
  2. Sift high protein flour into the mixing bowl. Add in salt, sugar, yeast. Pour in water.
  3. Use the mixer to knead the mixture.
  4. Add in butter when the dough is formed. Continue to knead the dough.
  5. Add in raisins and knead the dough till smooth and elastic. (I made a mistake by soaking the raisins for hour. When I added it in the mixer and knead, the raisins melted into the dough and no trace of raisins anymore. Then the dough turned out brown color. If the raisins were soaked only for few minutes, it won’t be melted into the dough.)
  6. Take out the dough. If it is too sticky, you can add in some flour to form a round shape. Rest it in a container or cover with cling foil. Let it proof for 2 hours or till it becomes double of its original size.
  7. Knead the dough to let the air comes out. Rest the dough in the container again for 1 hour.
  8. Divide the dough into 50g each and shape it. Set aside to rest for 30 minutes.
  9. Sprinkle some water on the small dough; it will help the wholegrain sticks on the dough.
  10. Put the wholegrain or oatmeal in a bowl; roll the dough in the bowl. Arrange the buns on the tray nicely. Set aside to rest for 1 hour.
  11. Bake the buns in the preheated oven at 180C upper heat / 160C lower heat or 180C for 15 – 20 minutes.


Monday, 14 May 2012

Batik Cake


There was once I ate this cake and remembered it every year must go to this friend’s house for the cake during Chinese New Year.  No doubt Sarawakian can make a good cake without using an oven.

The very first time I made this cake was 12 years ago. That time, I was trying to make a cake for myself. However, the outcome was too sweet because I put too much condensed milk into it. 

I heard that my sister will come to visit me and want me to prepare some desserts for her. Suddenly think of I have been long time did not make this cake.

Here is the recipe.


Preparation Time: 1 hour
Mould: 8-inch with removable bottom


Ingredients:

500g    Marie Biscuits
5          Eggs
250g    Margarine (I use Buttercup)
½ Tin   Full Cream Condensed Milk (1 tin about 375g if not mistaken)
1 tsp     Vanilla Essence
1½ cups Superfine Flour
½ cup   Castor Sugar
5 tbsps Cocoa Powder
5 tbsps Milo Powder
½ cup   Boiling Water


Method:
  1. Put all Marie Biscuits into a plastic bag and crush them into small pieces.
  2. Dissolve cocoa powder and Milo powder with boiling water. Set aside to cool.
  3. Grease the mould with baking paper.
  4. In a mixing bowl, beat margarine with sugar until well mixed.
  5. Add in eggs one by one. Add in Milo mixture, milk, flour and vanilla essence. Mix well.
  6. Transfer the mixture into a saucepan and cook at the low heat until it becomes soft dough. You must stir it non-stop to prevent the bottom becomes burnt.
  7. Add in crushed biscuits and stir well.
  8. Transfer the cooked dough into the mould and press it till firm.
  9. Leave it cool down then store it into the fridge for at least 5 hours.
  10. Cut the cake into small pieces to serve.
  11. Serve best when chilled.


Friday, 11 May 2012

Marble Chiffon Cake


Hooray … I just had my oven repaired. Now, the first pastry I want to try out from this oven is the simple chiffon cake. No no no, I want to have more than just a plain chiffon cake. Marble chiffon cake it is.


Baking Temperature: 200C without fan
Baking Time: 30 minutes
Mould: 8-inch chiffon mould


Ingredients:
(A)
150g     Superfine Flour
1 tsp     Baking Powder
1 tbsp   Milk Powder
½ tsp    Salt

(B)
45ml     Sunflower Oil
4          Egg Yolks
100ml   Water
1 tsp    Vanilla Essence
90g      Castor Sugar

(C)
4          Egg Whites
40g       Sugar
¼ tsp   Cream of Tartar

(D)
2 tbsps Cocoa Powder
2 tbsps Hot Water       


Method:

  1. Dissolve cocoa powder in hot water. Set aside.
  2. In a clean bowl, mix egg yolks with water. Then, add in 90g sugar until sugar is dissolved. Then, add in sunflower oil and mix till well-combined.
  3. Sift in superfine flour, baking powder, milk powder and salt. Fold till well-balanced.
  4. In another clean mixing bowl, beat egg whites. Add in sugar gradually when you see bubbles appear in egg whites. Then, add in cream of tartar.
  5. Whisk until soft peaks is form.
  6. Fold 1/2 of egg whites mixture into egg yolk mixture. Fold in the remaining egg whites mixture into egg yolk mixture. Mix well.
  7. Roughly fold in cocoa mixture into the batter. (* I made a mistake which I only fold in cocoa mixture in ½ of the batter. It ended half of the cake with pattern and another half is totally plain.)
  8. Bake at 200C for 30 minutes.


Saturday, 21 April 2012

Pancakes


I made pancake for my kid as her breakfast this morning. She liked it very much. When it was hot, the surface was crispy. When it was cold, it was soft and fluffy. We spread Nutella on the pancake and it was delicious.

Recipe adapted from Food 4 Tots


Preparation and Cook Time: ~ 40 minutes
Make 8 pancakes.  


Ingredients:
65g      Superfine Flour
1tsp     Double Action Baking Powder
100ml   Milk
1tbsp   Castor Sugar
½ tbsp Sunflower Oil
1          Egg, separated (at room temperature)
Pinch of Salt


Method:
  1. In a bowl, sieve flour and baking powder. Set aside.
  2. In another bowl, whisk egg yolk, sugar and milk together until thoroughly combined. Then stir in oil and mix well.
  3. Gradually stir in the sifted dry ingredients and mix till a smooth batter is formed.
  4. In a clean bowl, whisk egg white with salt till they form soft peaks.
  5. Gently fold the egg white mixture into batter with wire balloon whisk to roughly incorporate.
  6. Heat a non-stick pan on medium low heat.
  7. Pour little oil onto the pan and wipe with kitchen paper.
  8. Change the heat to low.
  9. Pour 2 tbsp pancake batter onto the pan and pan fry. Cook until air bubbles form and the edges are dry. Loosen and flip over. Fry till the surface turns golden colour. Once it is done, remove from pan.
  10. Serve warm with your favourite dressing sauce.


Thursday, 19 April 2012

Apple Muffins with Sunflower Seeds


I was trying to make an easy yet nice to eat little muffin. I tried this apple muffin with sunflower seeds. I am not sure is the texture used to be like soggy type or should it be a dry texture?! Anyway, I will share the recipe because this is the last baked cake from my oven. After I had finished baking the muffins, my oven’s door was sliding down and one of the screws dropped out. I need to send it to the service centre and not sure when I can get back my lovely oven.

This recipe is adapted from Food Lovers: Cupcakes & Delicious Bakes.


Oven Temperature: 200C
Baking Time: 20-30 minutes
Yield: 24 muffins (2.5 Oz each)


Ingredients:
30g      Sunflower Oil
4          Small Green Apples
225g    Superfine Flour
2tsp     Baking Powder
60g      Brown Sugar
1tsp     Mixed Spice
1          Egg
150ml   Plain Yoghurt

Topping: Sunflower Seeds


Method:


  1. Preheat the oven to 200C.
  2. Peel, core and finely chop the apples.
  3. Sift the flour and baking powder into a large bowl.
  4. Stir in the sugar, mixed spice and apples.
  5. Put the egg, yoghurt and oil in a jug and mix together.
  6. Pour the liquid ingredients into flour mixture and stir for a few seconds until just combined.
  7. Spoon the mixture equally into muffin cups. Sprinkle over the sunflower seeds.
  8. Bake in the oven for 20-30 minutes until the muffins are well risen and firm. Leave to cool on a wire rack.


Soft Sweet Buns


I made the buns last week according to my friend’s recipe. The buns were really soft. It was tedious because of waiting the dough to proof. Anyway, this is the recommended type if you like to eat soft bun.


Oven Temperature: 200C
Baking Time: 12-15 minutes
Yield: 12 Buns


Ingredients:
(A)
280g    High Protein Flour
3.5g     Instant Dry Yeast
167g    Cold Water

(B)
120g    High Protein Flour
8g        Instant Dry Yeast
6g        Salt
80g      Castor Sugar
15g      Milk Powder
27.5g   Cold Water
40g      Eggs (1 Egg)
40g      Butter
29g      Shortening

(C) For Glazing
1          Egg White
1tbsp   Water

(D) Fillings: (Optional)
Chicken Floss
Cheddar Cheese
Hotdog


Method:
  1. In a mixing bowl, mix well ingredients (A) without electrical mixer. Cover with cling wrap or towel and let the dough to proof in double size. This will take around 4-5 hours.
  2. Mix the proof dough with ingredient (B) except butter and shortening. Knead the dough mixture till the flour is well combined. 
  3. Add in butter and shortening. Continue to knead until it becomes smooth and elastic (non-sticky as well). (I used KA mixer to knead it at speed 3-4 for 20 minutes.)
  4. Put the dough in a tupperware with cover and rest it in the fridge for 15 minutes.
  5. Divide the dough into 50g each. Set aside for 15 minutes.
  6. Shape the dough and put some fillings.
  7. Allow the dough to proof for 1 hour at 40C. (I put it in the oven without switch on the temperature, but put a bowl of hot water underneath the tray.)
  8. Brush the dough with glaze and bake at 200C for 12-15 minutes. 


Thursday, 5 April 2012

Basic Swiss Roll


This is my first Swiss Roll after seeing my friend baked so many Swiss Rolls. First time to bake the cake and I found the cake baked with bubbles. I might need to shake the batter next time before I bake it.  

The steps are pretty simple and easy except the egg white mixture must be whisked till it forms a soft peak. The method is just similar to the chiffon cake method. I would say this is the basic Swiss Roll recipe and I still have rooms to improve. So, I will update the improvement methods for my next Swiss Roll.

Here is the recipe I baked for my first Swiss Roll.


Oven Temperature: 200C
Baking Time: 15 minutes
Mould: 10” x 14” x 1”

Ingredients:
For Sponge Cake:
(A)
4          Egg Yolks
25g      Castor Sugar
45g      Sunflower Oil
45g      Milk
85g      Superfine Flour

(B)
4          Egg Whites
85g      Castor Sugar

Filling: Strawberry Jam


Methods:

  1. In a mixing bowl, mix well egg yolks and castor sugar.
  2. Add in milk and oil. Mix well.
  3. Fold in superfine flour and mix well.
  4. In another clean mixing bowl, beat egg whites at low speed for 1 minute. Change the speed to higher. Add in sugar gradually when you see bubbles. Beat till soft peak is formed.
  5. Fold the egg whites mixture into egg yolks mixture gently and mix well (not to overmix).
  6. Pour the batter into greased mould. Use spatula to smoothen the batter surface.
  7. Bake in preheated oven at 200C for 15 minutes or until you press the surface and it springs back.
  8. Remove the cake from mould and cool at rack.
  9. After 1 hour or the cake is fully cooled down, remove the cake from the baking paper.
  10. Spread the jam on the cake.
  11. Start to roll …. (I rolled the cake by mistake and it looks not round in the middle.)
  12. Wrap and seal the cake with clean baking paper. Keep it in the fridge at least 1 hour to hold the shape.


Tuesday, 3 April 2012

Orange Muffins


These days the weather is not so good. We are encouraged to drink more water and eat more fruits to keep our body hydrated. To have some fruits in my pastries, I found I still have some Valencia oranges in my fridge. Something has just clicked in my mind! Orange muffins, here I go!


Oven Temperature: 180C
Baking Time: 15-20 minutes
Yield:  24 big muffins or (12 big muffins and 24 small muffins)


Ingredients:
(A)
250g    Butter (melted at room temperature)

(B)
180g    Castor Sugar
¼ tsp    Sugar

(C)
300g    Superfine Flour
1tsp     Baking Powder
10g      Milk Powder
50g      Ground Almonds

(D)
4          Eggs

(E)
50ml     Orange Juice
1tbsp    Orange Zest


Method:
  1. Beat butter on slow speed for 30 seconds. Add in ingredients (B) gradually and beat on high speed for 3 minutes till creamy.
  2. Change the speed to low speed and add in eggs one at a time. Mix well.
  3. Fold in ingredients (C) and mix well.
  4. Blend in Ingredients (E).
  5. Spoon the batter into muffin cups and bake in preheated oven at 180C for 15 – 20 minutes.


Tuesday, 27 March 2012

Orange Chiffon Cake


I never bake a good chiffon cake after I changed my oven. This time, I tried my luck to back another chiffon cake. Surprisingly, I have a baked chiffon cake. It is not soggy like previous one. I am glad that I finally get to know my oven better. Although my cake's outlook is a bit not up-to-standard.  :P


Baking Temperature: 200C (This is my oven temperature for the chiffon cake.)
Baking Time: 30-35 minutes
Mould Size: 9”


Ingredients:
(A)
150g    Superfine Flour
1tsp      Baking Powder
80g      Castor Sugar
1/4tsp   Salt

(B)
45g      Sunflower Oil
4          Egg Yolks
100ml   Orange Juice
1tsp      Orange Zest (I put ½ tsp which caused my cake has less orange aroma)

(C)
4          Egg Whites
60g      Castor Sugar
1/4tsp   Cream of Tartar


Method:
  1. For ingredients (A): Sift superfine flour and baking powder into a mixing bowl. Add in sugar and salt. Mix well. Set aside.
  2. For ingredients (B): In another bowl, combine orange juice, orange zest, egg yolk and sunflower oil in sequence.
  3. Add flour mixture into egg yolk mixture. Mix well. Set aside.
  4. In a clean bowl, whisk egg whites. When you see the bubbles, add in sugar gradually then followed by cream of tartar.
  5. Whisk the egg white mixture till a soft peak is formed.
  6.  Fold egg white mixture into egg yolk mixture.
  7. Bake at preheated oven 200C for 30-35 minutes.


Tuesday, 13 March 2012

Mini Honey Cake


Honey has been widely used in cooking and as a food decades ago. Historically, honey has been used by humans to treat a variety of ailments through topical application. However, children less than one year old should not be given honey due to their digestive system is still weak.

I tried the easiest way to make honey cake with only 6 ingredients. The texture of the cake is soft and spongy. It is sweet as my honey is sweeter than those sold in hypermarket. Please note that different honey will have different sweetness level. You might need to cut or maintain the honey ratio.  

Recipe adapted from 孟老師的100道小蛋糕(page 84


Baking Temperature: 160C
Baking Time: 15-20 minutes
Yield: 14 muffin cups (38x30mm)


Ingredients:

20g      Cooking Oil
30g      Honey
2          Eggs
20g      Castor Sugar
50g      Superfine Flour
1/4tsp   Baking Powder


Methods:

(1)  Double boil cooking oil and honey until well mixed.

(2)  In a mixing bowl, beat eggs and add in sugar gradually. Beat the egg mixture till the  color turns from yellowish to creamy light yellow. Beat at high speed until it becomes creamy white color. The mixture is done when you take out the beater and dripping line does not immediately disappeared. Then beat at low speed for 1 minute.

(3)  Sieve in flour and baking powder. Then, add in ingredients from step (1). Fold the batter until no trace of flour.

(4)  Pour the batter into muffin cups and set aside for 5 minutes.

(5)  Bake at preheated oven at 160C for 15-20 minutes.

(6)  Once done, invert the cake immediately on the rack and let it cool down. (I forgot to invert it immediately and you can see all my mini cakes shrink down.)  

Note:
  • Set the batter aside for 5 minutes to make the cake denser. 
  • Please beware of the oven temperature (should not use high heat) due to honey will cause the cake to be over baked.


Thursday, 8 March 2012

Cranberry Orange Muffins


Today is International Woman’s Day. It is an official holiday in Afghanistan, Armenia, Belarus, Burkina Faso, Cambodia, China (for women only), Cuba, Georgia, Guinea-Bissau, Eritrea, Kazakhstan, Kyrgyzstan, Laos, Macedonia (for women only), Madagascar (for women only), Moldova, Mongolia, Montenegro, Nepal (for women only), Russia, Tajikistan, Turkmenistan, Uganda, Ukraine, Uzbekistan, Vietnam and Zambia.

Unfortunately, Malaysia does not declare this as an official holiday. Anyway, today we deserve to do what we want and take a good rest.

After a long fighting with my fever, finally I have recovered 80% i.e. no more fever but cough and flu still remain.

Anyway, I decided to bake all my lady friends’ lovely muffins as a gift for the day. Hopefully, they will like it.


Recipe adapted from Food 4 Tots


Baking Temperature: 175C
Baking Time: 20-30 minutes
Yield: 24 muffins (38 x 30mm)


Ingredients: 

250g   Superfine Flour
3 tsp   Baking Powder
1 tsp   Salt
120g   Castor Sugar
2        Eggs (at room temperature, then lightly beaten)
4 tbsp Fresh Orange Juice
2 tsp  Orange Zest
180ml Sunflower Oil
1 tsp  Vanilla Extract
160g   Plain Yoghurt
100g   Dried Cranberries 


Methods: 

  1. Put the dried cranberries in a plastic bag. Pour drinking water inside the bag and immediately pour it out. Retaining a little bit of water inside. Leave the plastic bag overnight at room temperature. Pat dry any excess water before use it. 
  2. In a mixing bowl, sieve flour and baking powder. Add in sugar and salt. Mix well. Set aside. 
  3. In another bowl, whisk together the lightly beaten eggs, oil, yoghurt, vanilla extract, orange juice and orange zest until it becomes creamer. it will be a bit cuddled. DO NOT over-beat the mixture.  
  4. Fold the wet mixture into the dry ingredients by using spatula until they are well combined and no traces of flour. 
  5. Stir in cranberries and mix well. 
  6. Do not over-mix the batter. The batter should be thick ("spoonable" not "pourable").
  7. Spoon the batter into muffin cups or you can use piping bag to put the batter until 80% full. 
  8. Bake at 175C for 30 minutes. (This is the temperature and time for my muffins. Different oven might have vary temperature and time). 


Thursday, 1 March 2012

Pork Floss Buns


Today I try to make sweet buns again as I was not making a good bun last Thursday.

This time, I use KA mixer to knead the dough at speed 2 for 20 minutes. Then, I knead the dough by hand for about 1 hour till the dough does not stick to my hands and I can stretch it till it becomes a thin mask.

I follow the steps from 周老師的美食教室 as she has explains clearly how to make a good dough with steps by steps photo. This is a very useful website!


Baking Time: 15-20 minutes
Baking Temperature: 175C
Yield: 12

Ingredients:

(A)
180g                Water
1/2tbsp            Instant Dry Yeast
320g                High Protein Flour
80g                  Superfine Flour
80g                  Castor Sugar
1tsp                 Salt
16g                  Milk Powder
1                      Egg

(B)
40g                  Unsalted Butter (at room temperature)

(C) Mixed Well
1                      Egg Yolk
1/2tbsp             water               

(D)
Mayonnaise
Pork Floss


Method:

(1)   In a mixing bowl, put all ingredients (A) and use the lowest speed to knead the mixture. Change to higher speed when the mixture is well combined.
(2)   Add in unsalted butter and continue knead at higher speed. (Different mixer needs different speed and time. I use KA mixer at speed 2 for 20 minutes and knead the dough by hand for 1 hour).
(3)   The dough is done when you knead it till you feels it is no more sticky and it can be stretched to become a thin mask (please do not add flour when you knead the dough).  
(4)   Put the dough in a big bowl and cover it tightly. Let it proof for 2 ½ hours.
(5)   Wait until the dough becomes double in size. Test the doneness of the dough: Use one finger to poke the dough, if it holds the indentation, then it’s ready.
(6)   Use your hand to knead out the air from the dough.
(7)   Divide the dough into 12 pieces, each at 45g.
(8)   Round it and let it rest for 15 minutes.
(9)   Roll the dough into your favorite shape. Brush with ingredients (C).
(10)Put the ready dough in oven with a bowl of hot water at the bottom of the oven for final proof, approximately 55 minutes.
(11)Brush the dough with egg yolk mixture. Bake the dough at preheated the oven at 175C for 15-20 minutes. 
(12)Remove the buns from the mould and let it cool on a rack. 
(13)Put some mayonnaise on the top of the buns and sprinkle some pork floss. 


Sunday, 26 February 2012

Passion Fruit Cake


Fresh passion fruit is high in beta carotene, potassium and dietary fiber. Passion fruit juice is a good source of Vitamin C and good for people who have high blood pressure. It is a good start to give it a try on a cake.

I bought the passion fruits from night market at RM10 per packet and only used 4 passion fruits for 80ml fresh juice.

Well, since this is my first time to use combination of passion fruit juice and dried apricot, some of my mini cakes got burn on the apricot surface as I put the apricot as topping of the cake batter. I should not use 180C for baking this cake. It might be reduced to 170C.

Anyway, the taste still good and the burn did not spoil my cake. I can smell the fresh passion fruit fragrant from my oven. If you like to eat a fresh fragrant cake, you should give it a try!

Recipe adapted from 孟老師的100 道小蛋糕.


Baking Duration: 20-25 minutes
Baking Temperature: Upper heat 180C, lower heat 160C 
(My oven does not have upper and lower temperatures, so I use 180C. Suggest you change it to 170C as I burnt my apricot when I use 180C).
Yield: 12 mini cakes


Ingredients:

150g     Dried Apricots   
60g       Unsalted Butter
70g       Icing Sugar
180g     Egg
80g       Pure Passion Fruit Juice (I use only 80ml)
50g       Superfine Flour
1/2tsp   Baking Powder
120g     Ground Almond


Method:
(1)   Cut dried apricots into thin slices. Melt the butter in double boil method. Set aside.
(2)   In a mixing bowl, beat together icing sugar and egg until light and fluffy. Then, add in passion fruit juice and beat until well mixed.
(3)   Sift in superfine flour and baking powder, followed by ground almond and melted butter. Fold the mixture well.
(4)   Pour the mixture into small cup. Top with sliced dried apricots.
(5)   Bake in preheated oven at upper heat 180C, lower heat 160C for 20-25 minutes. (If the oven is using only one temperature, the temperature will be around 165-170C). 


Related Posts Plugin for WordPress, Blogger...